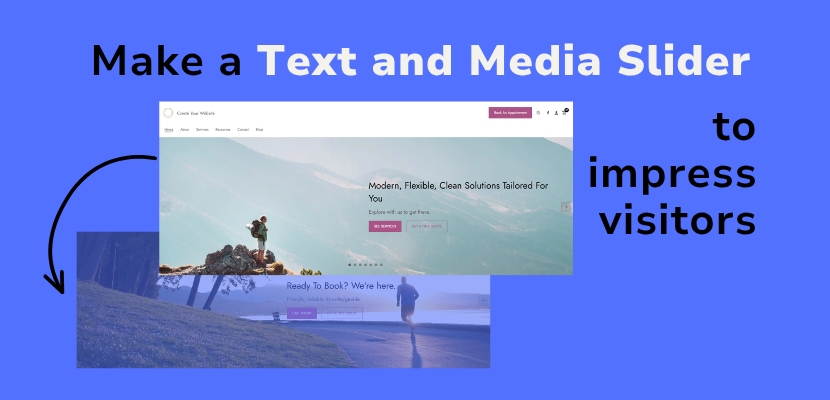
Here’s a walkthrough of all of the possibilities you can unlock with the Text and Media slider. The Text and Media slider differs from the classic gallery slider by allowing for more customizations for the text, with a title, description, and button option for each slide. It also allows for customization of the slide height, content width, and content position.
Watch the video for a full tutorial, or scroll down for the entire video transcript.
Transcript below:
Hi everyone! Here is a video tutorial to show you how to add a text and media slider or slideshow to your website, using the Website.com site builder.
A text and media slideshow is a great way to improve user engagement by showcasing multiple visuals and titles in a single space, and the text and video slider can be a great option for a dynamic hero section, or a showstopping section further down the page.
I’ll show you how to customize the slide height, content width and content position, which is how it differs from our classic gallery slider.
To see the video tutorial for the classic gallery slider on the sitebuilder, you can see the link to that video in our description.
Here’s how to easily add a text and slider gallery to your website.
So I’ve already logged into my website, and now let’s say I want to add a text and media slider gallery as the welcome section.
We’ll click Add Section right under the header section, and then choose Slider.
Now you’ll see the different types of sliders here.
At the top are the classic gallery sliders. While you can add text to these sliders, they’ll appear as a caption over the image, and you’ll have less control over the style and positioning for the text.
So these options would be great for a gallery of images if you want to showcase a portfolio.
For a hero section, we’ll scroll down and pick one of these Text and Media slider layouts.
This is a great one because it has no padding on the top or bottom, which means the image extends all the way to the edges of the section which gives a very grand feel.
The slideshow itself also has the overarching title and description toggled off, which is why the only text that will appear on the slideshow will be the titles, descriptions or buttons for each slide.
Now hover and click Add Section.
We’ve added it here.
You can add a title and description for the gallery section that will appear at the top here.
Now let’s start customizing the gallery.
So we’ll click right on it here.
We’ll see that we’re now customizing the first slide.
You can click here to change the image, and you can upload and change it directly, or select from files.
So we’ll choose select from files.
Now you can upload an image to your file library to use in your gallery, or even choose one of the stock photos that are free for you to use.
So we’ll change the image.
And now you can adjust the image to fill the gallery display, or fit within it.
And depending on that choice, you can also adjust the position of the image as well.
Now you can also choose to add a link, so when visitors click on this image slide, it will lead them somewhere.
So let’s look at those options.
Let’s say we chose Lightbox, that means the when visitors click on this image, it will open up into a lightbox, where the rest of the website is dimmed and the image is enlarged and in focus.
If you add a title and description to this image slide, it will also appear in the lightbox as well.
So let’s save that.
And Alt Text is so important for your SEO and to make your website more accessible to users.
That means that if the image does not load, it will show the Alt Text, so you want to describe the image exactly as it would appear.
Now that I’ve edited this slide, you can click on the arrow up here to go to the next slide image and continue editing. Or, we can click Back.
If you scroll, you’ll see that you can edit the slide images for this slider section by clicking on it.
Or beside each slide, you can click the pencil icon, you can change the order of the slide, or delete it from the gallery.
If you want to add a new slide to the gallery, just click add image.
Now let’s get to customing the display settings for this gallery.
So scroll to where you see Change Colors and Layout under Slider.
Now you can change the gallery design altogether here, and we’ll leave that for now,
So first you can adjust the text alignment.
I’ll keep the top and bottom padding set to none, but just to show you, I’ll increase that, and you can see that now if you click on that area, you’ll be able to toggle on a title, subtitle, and other content for the overarching section.
But I prefer to keep that all toggled off, and I don’t want any padding above or below this slider section. I also want to keep it set to full width.
Now you can also choose to set the opacity of the overlay, and having a bit of an overlay can help the text pop out from the image, depending on what image you have in the slideshow.
Now let’s adjust the content positon.
So this refers to the positioning of the text and buttons on the slider.
Before I adjust this, I’ll set the content width to narrow, and now I’ll reposition the text.
Now lastly, I’ll adjust the slide height and set it to Large.
So let’s go to the preview and see what it looks like so far.
Now let’s go back to the editor and back to Change Colors and Layout.
Now you can choose the slideshow settings.
If you toggle on autoplay, once visitors land on the page with the slider, the images will automatically move through the slideshow, without visitors needing to click any navigation arrows.
You can also choose to have the images loop, or if you would like it to be apparent that the last image in the slideshow has been reached.
If the images loop, then when it reaches the last slide, whether visitors click the navigation arrow to move forward, or if the slider is on autopay, it will go smoothly go back to the first slide without breaking up the flow of the slider.
You can choose to show the navigation arrows, so visitors can scroll through the slideshow by clicking on the arrows, and you can choose the style of the arrows, and whether you want the arrows to show on the slider parameters, or below the slider.
Now you can also slide pagination, which shows visitors which slide they are in on the slider.
Some of the pagination types, like dots, also gives them a way to interact with the slider by choosing to directly jump to a specific slide by clicking on the pagination indicator.
You can choose how to display the pagination, for example dots, progress bar, etc.
So this slideshow can add some excitement and originality to your website design.
Especially for a top section, the text and media slider can be a great option, or as a showstopping portfolio or case study section further down the web page.
So let’s publish and look at the live version of our website.
So here is the slider.
And now you can see how the slider will look on the published website.
So that’s it for this video! As you can see it’s very easy to add a slider to showcase images and text on your website in a dynamic way.
We hope this video was helpful, and thanks for watching!